Introduction to HPC Tutorials
To begin, access the cluster through Open OnDemand and open the shell window. This can be done by by going to the top navigation bar, clicking on the Clusters tab and selecting the Shell Access button.
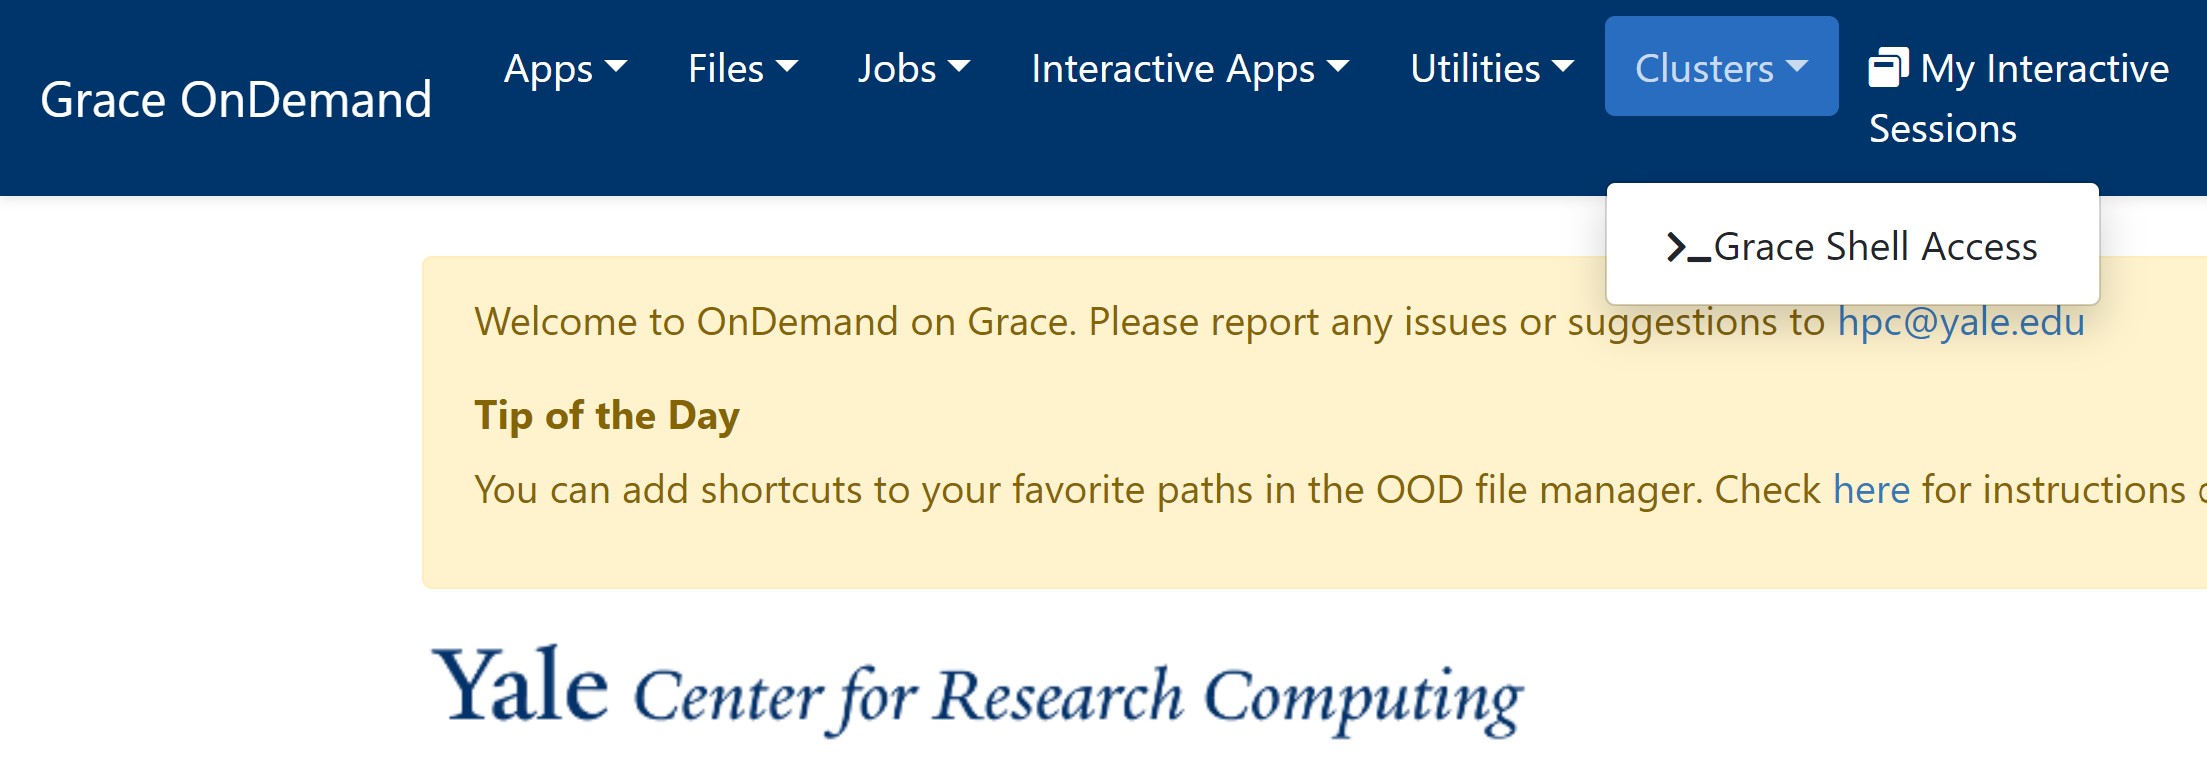
Once the new shell window is loaded, you will be able use this interface like your local command interface. Now that you're setup in a shell window, you can begin the first task like so:
Part 1: Interactive Jobs
Inside of the shell window, start an interactive job with the default resource requests. Once you are allocated space off the login node, load the Miniconda module and create a Conda environment for this exercise. This can be done like so:
# Ask for an interactive session
salloc

# Load the Miniconda module
module load miniconda

# Create a test environment with Conda that contains the default Python version
conda create -yn tutorial_env python jupyter

# Activate the new environment
conda activate tutorial_env

# Deactivate the new environment
conda deactivate

# Exit your interactive job to free the resources
exit
Part 2: Batch Jobs
Going off of the environment we created in part 1, navigate to the Files tab in OOD and select your project directory. Click the '+ New File' button and name the file message_decode_tutorial.py. Once the new file is created, open this file in the OOD text editor by going to the file, clicking the three-dot more button, and selecting edit in the dropdown menu like so:
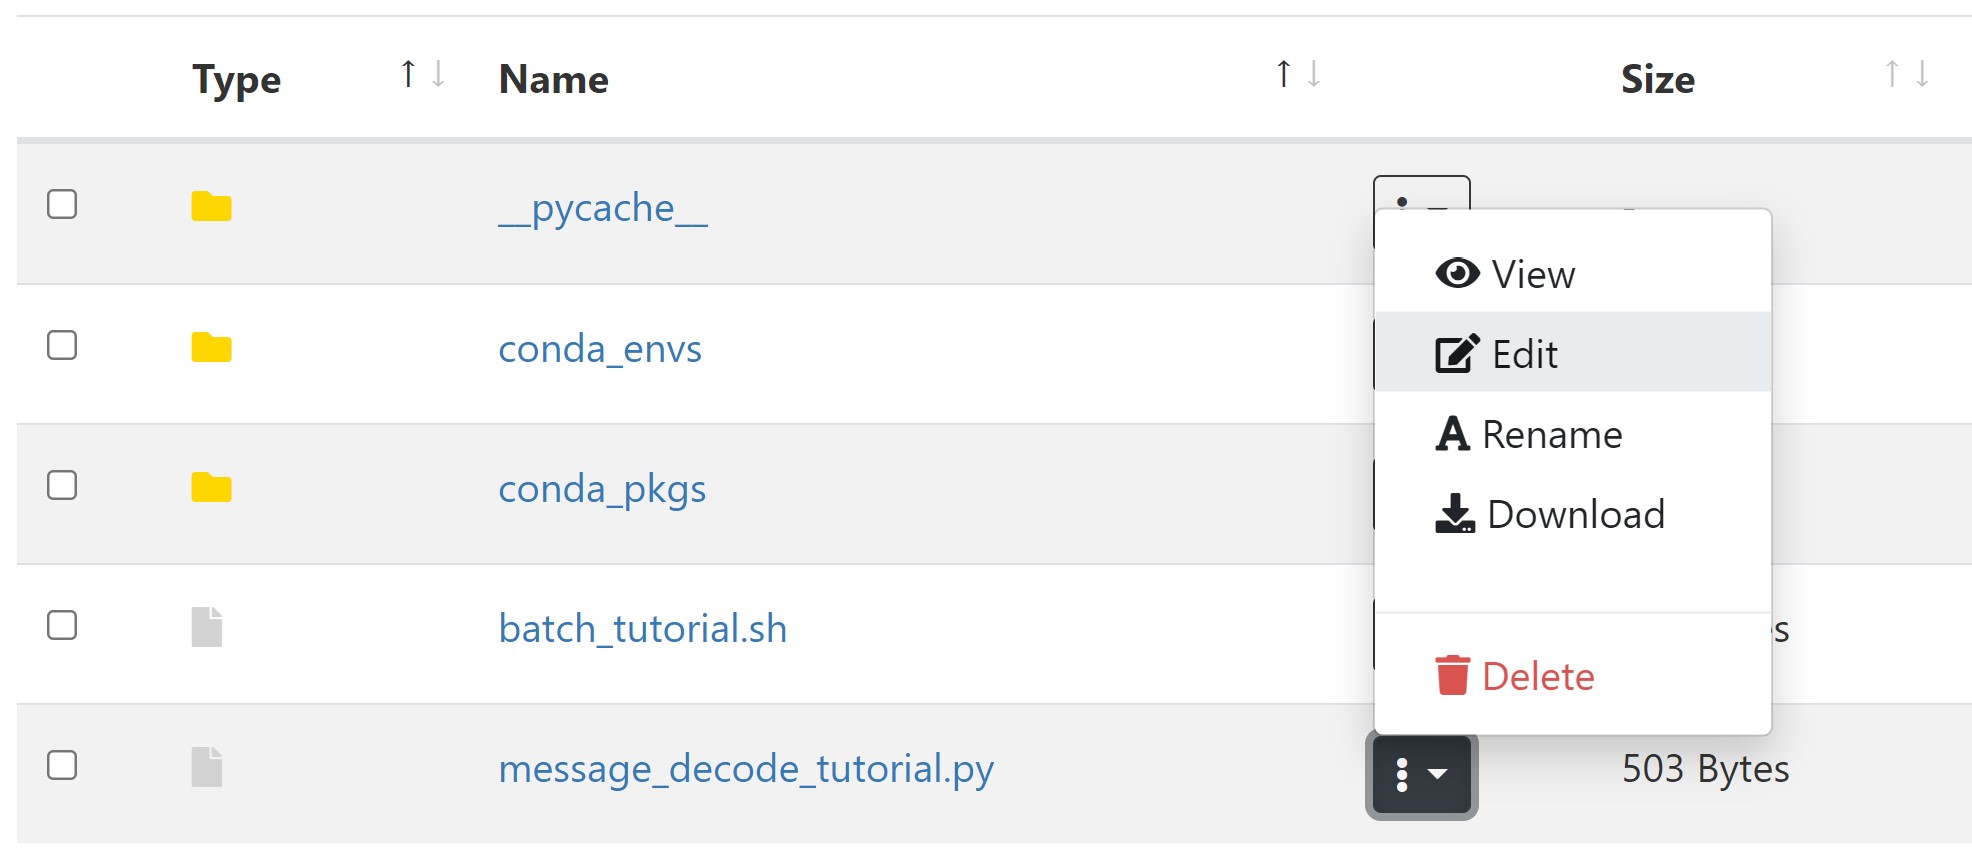
Once the text editor is open, paste this python example inside of the file:
def message_decode_tutorial(message, c):
    holder = ""
    for letter in range(0, len(message)):
        if (letter + 1) % c == 0:
            holder = holder + message[letter]
    return holder

message = 'gT baZu lWp Kjv uXyeS nViU fdlH gJr KaIc tBpl Sy\
Jox MtUl Qbm kGTp UdHe hdLJf Nu IcPRu XhBtDjf TsmPf\
o DoKfw xP qyTcJ tUpYrv Pk ArBCf Wrtp JfRcX JqPdKLC'

cypher = message_decode_tutorial(message, 10)

with open('/home/NETID/decoded_example.txt','w+') as output:
    print(cypher, file=output)
This python function takes a given message and parses through it against the parameters of a cypher, which in our case writes every 10th letter. Make sure to replace the placeholder 'NETID' in the second to last line with your personal NetID. This will allow your output file to go into your homespace.
From here, navigate back to your project directory and select the '+ New File' button, this time naming it batch_tutorial.sh. Using Slurm options to define resource requests for this job, paste the following code inside of this file like you did the previous file:
#!/bin/bash

#SBATCH --job-name=message_decode_tutorial
#SBATCH --time=1:00
#SBATCH --mem-per-cpu=2MB
#SBATCH --mail-type=ALL

module load miniconda

source activate tutorial_env

python message_decode_tutorial.py
Because the partition isn't specified for this job, it will run on the cluster's default partition. From there, you can go back to the shell window, navigate to your project directory and run the sbatch command to begin your batch job like so:
# Navigate to the project directory
cd project

# Use Slurm to start a batch job
sbatch batch_tutorial.sh
Once you receive an email saying the job is complete, navigate to your home-space through the shell window on Open OnDemand. Within this directory you will find a file called decoded_example.txt. To quickly see the file contents, use the cat command to print the file's contents on the standard output, revealing the decoded message like so:
# Navigate to your homespace (replacing NETID with your netID)
cd /home/NETID

# Print out the decoded message
cat decoded_example.txt
Part 3: Interactive Apps on OOD
Now that you have completed both an interactive and batch job, try using Jupyter Notebooks on Open OnDemand for your work. This can be done in the shell window like so:
# Purge any loaded modules
module purge

# Build your environment dropdown tab on OOD
ycrc_conda_env.sh update
Now that this is completed, return to the Open OnDemand homepage and select the Interactive Apps dropdown tab in the top navigation bar. From there you can select Jupyter and load the job submission request form. To select your resources, make sure to consult our Slurm documentation as well as the specific cluster's partition information to ensure you're selecting the appropriate resources for your job's needs.
Once the session is submitted and running, connect to the notebook and navigate to your working directory. From there you can either select the Upload button to upload an existing Jupyter notebook file or select the New button to create a new notebook.
To help with this, make sure to look over the YCRC Jupyter Notebook information as well as Jupyter's User Interface page.