Spark
Apache Spark is a powerful tool that enables distributed processing of large datasets that cannot fit into a single compute node. Spark is installed on all our clusters, including PySpark and Scala as part of the software modules. Additionally, templates for both interactive and batch-mode configuration are available.
Resource allocation and using spark-start
Using Spark on HPC systems requires two steps:
- start a Spark instance running on compute node(s)
- submit work to that instance via web or command-line interfaces
The installations of Spark on the Yale HPC systems include utilities that help with both of these steps, spark-start and spark-submit.
spark-start Collects specific Slurm environment variables and creates spark-env.sh file in $HOME/.spark-local before starting the Spark server.
spark-submit Submits work to the Spark server, requesting user-defined resources for a specific input script.
Below are several examples of common workflows.
Interactive Spark job
Spark can be set up to run interactively by starting the Spark server and printing out the $SPARK_MASTER_URL where jobs can be submitted via the Spark web-interface.
An example sbatch script is shown below which requests two compute nodes, each with 36 CPUs and 180G of memory.
Note, the spark-start script expects the memory request to be --mem and not --mem-per-cpu.
#!/bin/bash
#SBATCH --job-name=spark-cluster
#SBATCH --partition=day
#SBATCH --nodes=2                # node count, change as needed
#SBATCH --ntasks-per-node=1      # do not change, leave as 1 task per node
#SBATCH --cpus-per-task=36       # cpu-cores per task, change as needed
#SBATCH --mem 180G               # memory per node, change as needed
#SBATCH --time=00:60:00
#SBATCH --mail-type=NONE

# These modules are required. You may need to customize the module version
# depending on which cluster you are on.
module load Spark/3.5.1-foss-2022b-Scala-2.13

# Start the Spark instance.
spark-start

# Source spark-env.sh to get useful env variables.
source ${HOME}/.spark-local/${SLURM_JOB_ID}/spark/conf/spark-env.sh

echo "***** Spark cluster is running. Submit jobs to ${SPARK_MASTER_URL}. *****"

# set up SSH tunnel for spark web-interface
node=$(hostname -s)
user=$(whoami)
cluster=$(hostname -f | awk -F"." '{print $2}')
web_port=8080

# print tunneling instructions
echo -e "
MacOS or linux terminal command to create your ssh tunnel:
ssh -N -L ${web_port}:${node}:${web_port} ${user}@${cluster}.ycrc.yale.edu

Forwarded port:same as remote port
Remote server: ${node}
Remote port: ${port}
SSH server: ${cluster}.hpc.yale.edu
SSH login: $user
SSH port: 22

Use a Browser on your local machine to go to:
localhost:${port}
"

sleep infinity
spark://$NODE.grace.ycrc.yale.edu:7077 (where $NODE is replaced by the node where the job is running) address from anywhere on the cluster.
To use the web UI from outside the cluster, an ssh command is needed to connect your local computer to the compute node where the Spark server is running.
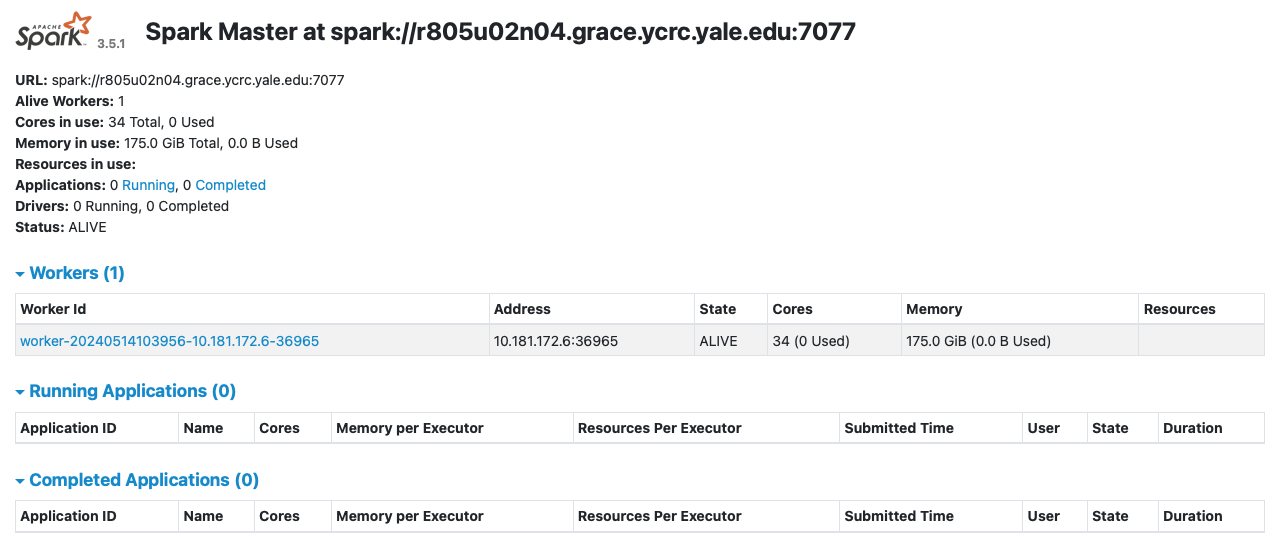
After making the ssh tunnel connection, navigate to localhost:8080 to view the web UI to monitor your jobs.
Navigating to the web-interface URL yields an overview like this:
Spark batch job
While the interactive workflow is useful for testing, it can be an inefficient use of allocated resources. It is therefore preferable to submit jobs as part of the Spark sbatch script.
This example first starts up the Spark server as before, but then immediately submits work to the server via the spark-submit script.
Note, replace the placeholder with the real path to the analysis code.
#!/bin/bash
#SBATCH --job-name=spark-cluster
#SBATCH --partition=day
#SBATCH --nodes=2                # node count, change as needed
#SBATCH --ntasks-per-node=1      # do not change, leave as 1 task per node
#SBATCH --cpus-per-task=36       # cpu-cores per task, change as needed
#SBATCH --mem 180G               # memory per node, change as needed
#SBATCH --time=1:00:00
#SBATCH --mail-type=NONE

# These modules are required. You may need to customize the module version
# depending on which cluster you are on.
module load Spark/3.5.1-foss-2022b-Scala-2.13

# Start the Spark instance.
spark-start

# Source spark-env.sh to get useful env variables.
source ${HOME}/.spark-local/${SLURM_JOB_ID}/spark/conf/spark-env.sh

# print tunneling instructions
echo -e "
MacOS or linux terminal command to create your ssh tunnel:
ssh -N -L ${web_port}:${node}:${web_port} ${user}@${cluster}.ycrc.yale.edu

Forwarded port:same as remote port
Remote server: ${node}
Remote port: ${port}
SSH server: ${cluster}.hpc.yale.edu
SSH login: $user
SSH port: 22

Use a Browser on your local machine to go to:
localhost:${port}
"

# Customize the executor resources below to match resources requested above
# with an allowance for spark driver overhead. Also change the path to your spark job.
spark-submit --master ${SPARK_MASTER_URL} \
  --executor-cores 1 \
  --executor-memory 5G \
  --total-executor-cores $((SLURM_CPUS_ON_NODE - 1)) \
  /path/to/custom/analysis.py